Moving right along. After about a year of dating, my neighbor she decide she really needed to go back to school and become a nurse like she has always wanted too. To make things easier on all of us financially she and her daughter moved in with me. She concentrated on her nursing school and graduated a little over a year later.
We had been talking about getting a house for quite awhile but neither of us had good credit and didnt think there was any chance we could get a mortgage, we couldn't even get a credit card approval let alone a mortgage. I started working on fixing her credit report, mine is hopeless especially with a bankruptcy on it. After a few months of getting her report cleaned up we saw her credit score start getting better and better.
Eventually it was high enough to get an approval on a home loan. We decided that we were tired of living in the ghetto neighborhood, if you seen the movie "Friday" that the only way I can describe it.
I couldn't believe I was saying it but I actually missed the very lifestyle that I couldn't wait to get away from years ago. We talked about getting a house in the country, growing our own foods, raising chickens and pigs, setting up a solar system and doing as much as we can to be self sufficient.
Another reason for my decision to get away from the city was my daughter, I wanted her to be able to experience things that I did when i was a kid and not being so concerned about her playing outside alone.
We searched and searched for the right place. We found a few that we wanted but they fell through and then one day we were just driving along and spotted a for sale sign in front of a home and we both knew that was the place we wanted.
It was only and acre but laid out like a football field, zoned open rural, right up the road from the inlet to the ocean, close to the beach, totally fenced in and gated and on a dead end street. The home itself, a small 8 yr old but very well cared for singlewide mobile home.

I'm Happy to say that we closed on the house last week and life is good.
The intent of this blog is to chronicle the evolution of our small homestead.
I'll be adding a list of our short and long term plans and add photos as we go.
thats all for now.
an added note: the way the blogger is set up it publishes new posts to the top of the blog, to keep it in order I have to change the dates so new posts are dated earlier than old posts
Beginning Homesteaders part 2
Todays Project Saltwater Reef Tank
Back a few years ago I had put together a saltwater reef aquarium. Lots of work to get everything going but once I did it was a self sustaining, balanced ecosystem with no mechanical filtration except for a protein skimmer, in simple terms a device that injects air into the water to create bubbles and cause foam which traps organic compounds before they begin to decompose. pretty much the same thing ocean waves do when they create seafoam.
Once it's up and going the entire system takes care of itself, nitrifing bacteria colonize calcified coral skeletons AKA live rock. the live rock becomes the natural biofilter in the system. Invertebrates such as snails, small hermit crabs and cleaner shrimp are introduced into the system as cleanup crews. they control unwanted algae and sift through the dirt and rock cleaning up all the debris.
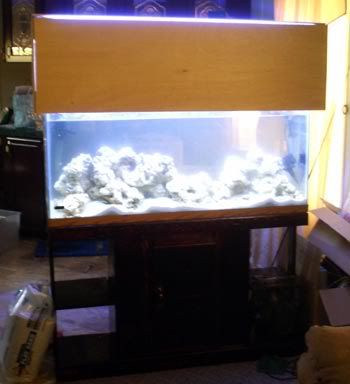
Now that we have a house of our own and aren't renting I decided to set up my reef once again. First thing I needed to do was change the color of my tank stand. It was originally pine that was coated with polyurethane clearcoat but because all of the cabinetry in the house is a red mahogany color and I am going to use the tank as a room divider between the dining/kitchen areas I wanted the tank to match the rest of the cabinets.
Stripping clearcoat from wood is not as easy as it may seem. I started out with 80 grit sandpaper and a small electric sander but after about an hour of sanding and getting nowhere fast I decided to go the chemical stripper route. The first chemical stripper i bought was a cheap all purpose stripper, I learned my lesson in a hurry, you get what you pay for.
The stuff was useless and I ended up going back to the store and buying a can of Formsbys wood stripper. Brush it on, wait 30 mins, scrape the finish off. It worked pretty well but still not good enough. In my frustration I looked over at my DA sander and air compressor and decided to give it a shot. It slapped on a disk of 60 grit paper , fired up the DA and it tore through the clearcoat easily, a little to easily actually. The DA left some deep swirls in the wood that weren't so noticeable on the bare wood but when I hit it with the stain all of those areas got really dark.
At that point I decided , screw it, it's staying that way. Once the stain soaked in i coated the entire thing in polyurethane clear. I also needed to close in the back of the stand since it was going to be seen from all sides, simple fix, some furring strips and a 24"x24" sheet of plywood and the stand looks like it was made that way.
here are some pics of the finished stand


The next thing I had to do was build a canopy to house the VHO (Very High Output) lighting for the tank. My lighting system should put out 440 watts of 10,000k (sunlight spectrum)light. Most types of corals need intense lighting to thrive and this should give me enough to keep almost any type of coral.
for the canopy I used 1x4" lumber with 2"x2" posts in the corners, i made it 14"high with a 2" overlap that will go over the top of the tank.
I'm no carpenter so I'm pretty happy with how it came out. 

heres the tank sitting on the stand with the canopy frame on top. I still need to cover the frame with plywood and build a hinged lid for the top. 
thats all for today, i'll post updated pics when the stand/canopy are complete and lights have been installed.
Reef tank part 2
Continuing on with my saltwater reef tank project. Today we went to a store called Bio-reef to check out some of the stock and pickup some supplies for the tank. I got a bag of instant ocean salt to mix up 50 gallons of saltwater and on the way home we stopped at Home Depot to pick up (2) 50lb bags of play sand for the tank substrate.
I got home and cleaned out all of the shells I was storing in the bottom of the tank,
then we poured in one of the 50lb bags of sand. turns out I only needed one bag. oh well it was $3.50 a bag so no great loss there.
I crushed up the shells that i had sitting in the tank and added them to the sand. the shells contain a high amount of calcium which helps to maintain the proper PH levels in the water.
Next came the rock.At one point this rock was loaded with life from the reef in figi, it also cost me about $4.00/lb when I bought it years ago. Sadly, after I tore the tank down and pulled the rock from the water everything died off and now it's just base rock. What i'm going to do is purchase some fresh live rock and add it to the base rock. this will seed the base rock and after a short while you wont even know the difference, the dead rock will be live again.
next steps:
finish the canopy, add the lighting, fill up the tank, drop in a dead shrimp or two to start the cycle, add a few pounds of live rock to the base rock and throw in the cleanup crew. Since I live at the beach I'm going to go collect a few dozen red legged hermits if i can find some this time of year.
Reef Tank Part 3
Time to finish up the light canopy. I'll be running 4 florescent VHO lamps with an Icecap 660 ballast for a total of 440 watts of lighting.
I picked up a 4x8 sheet of 1/4" plywood and had it cut to size at Lowes and attached it to the frame with paneling nails.
next I measured for the risers to mount the endcaps for the bulbs, then i remeasured 10 more times and test fit before drilling pilot holes for mounting screws.
then I checked the fit and checked it again just to make sure.
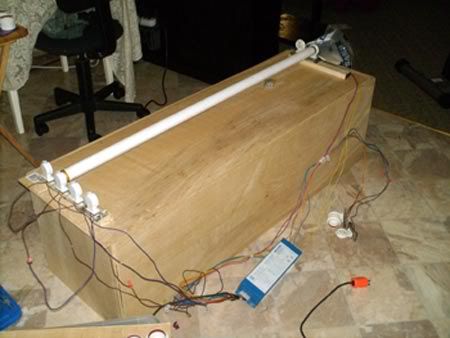
I mounted the remaining lamps the same way and switched it on to test it out. (note:do not look directly at the lamps when you plug them in, i was seeing spots for 30 mins after)
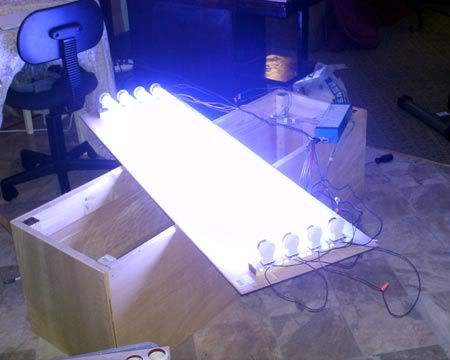
Damn thats bright!
I finished up the top and mounted it to the hinges
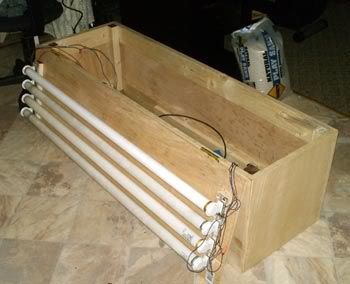
Then i placed it on top of the tank and switched it on
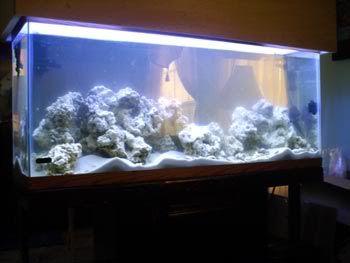
perfect, now I have to mount the ballast, clean up the wiring , add the handle to the top ,add molding around the corners and stain it to match the stand.